
I'm excited to finally do a post on a step by step tutorial on oil based paint, which is a very cheap alternative to your lacquered mirror look with the same durability. Over the past year I've gotten so many requests for a tutorial on a lacquered look paint job, here it is finally! Mind you, only a very selected companies still sell oil based paint anymore ...
A. because it's very toxic, that especially targets people like me who use oil base paint often, not so much the one time project kind of deal.
B. because there are alternatives now in the latex and water base paint arena that offer similar sheen and that are much safer. Personally, I am convinced unless is oil based or lacquer that is the ONLY way to truly get the mirrored look AND the durability
You can find oil based paint sold at Home Depot, which is my go to store for all my hardware items. It comes in a very selected amount of colors but thankfully the most classic colors; royal blue, black, white, red, hunter green...
First and Fore Most
- Preferably do your project out side, on a sunny day or in an open garage with high ventilation. The vapors are very toxic and high air traffic is best. Do not-not-not have any kids/pets around when using this product!! Now imagine I repeated that 5 times.
- Understand that your oil based paint project needs a minimum of 4 hours before you can apply another coat and 13 hours to completely dry to the touch. So with that in mind set your project in a spot, like a garage, that you can continuously work on with out moving it much.
- The brush: Yes, technically you can wash off oil based paint with mineral spirits but, it's really not worth the time. Between paint coats a handy tip is to tightly wrap the fibers of your brush in a plastic baggy! Wrapping it in plastic won't allow it to dry and when your ready for the next coat you can just remove and begin again, with out washing. Atempting to clean your brush is a waste of time. Your going to have to throw your brush away when your project is done.
- Oil based paint is a "self leveling paint" Its very unique in this way and unlike other paints. You want thick layers on horizontal surfaces and very thin layers on vertical surfaces. At first it will look like it has a bunch of brush strokes and levels out into a mirrored look
That aside
- Oil based if fun to use! because it's very easy to apply and needs little prep and no extra topping like a clear coat, and for most projects you can get away with using NO PRIMER!?
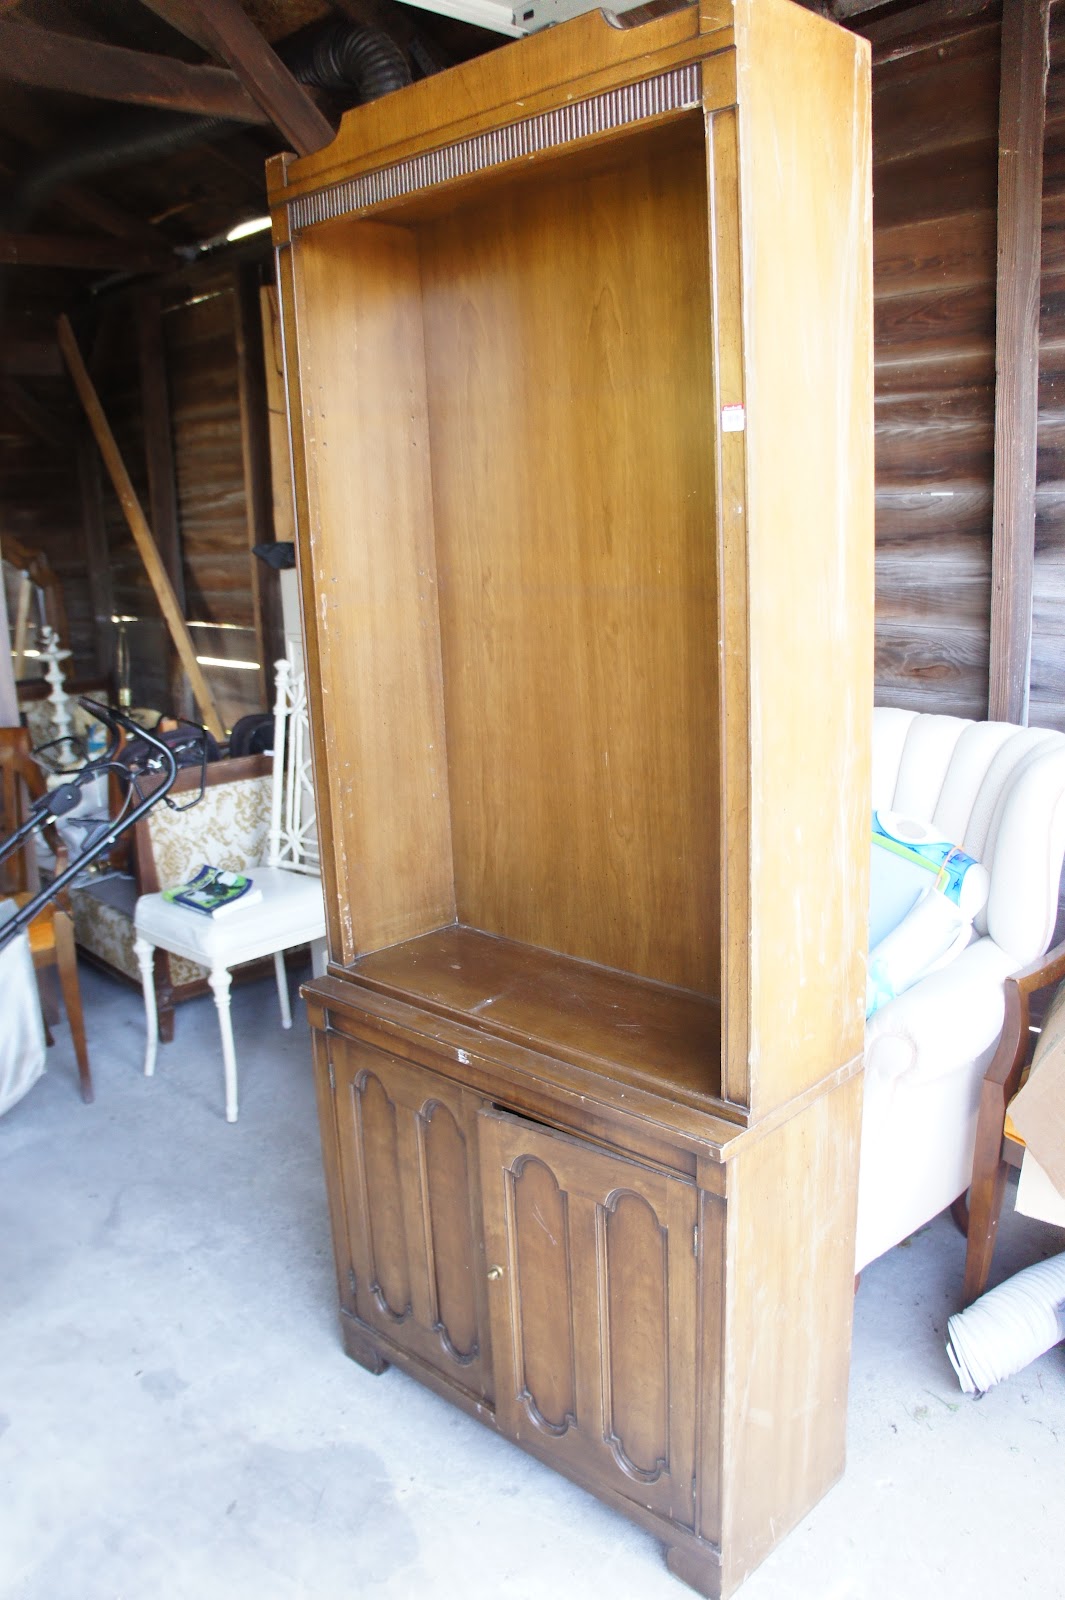
This is my piece! A small china cabinet.
The plan:
High gloss black with Kelly Wearstler wallpaper backing the inside
Start by removing all hardware

Work your sander lightly all over the entire exterior surface of your piece of furniture.

My tool? Black & Decker Mouse.
Its cheap and great for light sanding. I have a much heavier duty one for more serious projects.

With a lightly damp rag wipe down all surfaces

With preferably a pointy Q-tip pull out any particles from corners

Literally just start applying your first layer of paint. You want each layer to be light. The first layer you want it to be so thin you can almost see the wood through it.
Your first oil based paint project will scare you because as you can see in my un edited photographs there are TONS of visible brush strokes. THIS IS NORMAL. The paint will level and become mirror like in a few hours, even on vertical surfaces.
Remember, on all vertical surfaces you eventually want 3 thin layer.


I told you, scary right? So many brush strokes!


You are going to paint ALL vertical surfaces with that method until you come to your horizontal surface


Now with your horizontal surface you want to pour some paint on. Quite a bit but not a ton! Again remember you want 3 very thing layers of paint on the vertical surfaces and 2 thick layers on the horizontal.

OK now that you've brushed it out its going to look like this:

One uncomfortably thick layer, with some brush strokes. I took this image so you can really see just how globby it looks so when you do it at home you will realize this is normal. In a few hours this will level and become very mirror like!

Embarrassingly enough I knew I was backing the inside with wall paper but I was on such a roll, rocking out, that I painted that surface that I'm going to apply it too, haha... its ok :)

Are you ready for a critical part?
30-50 minutes after you've done with the first layer and its spent some time drying. Go back and re-check to make sure there are no drips. You'll be surprised at how thin of a layer you'll put on the vertical surfaces and some how it will always drip in 30 minutes.
Simply with one brush stroke whisk it away. Do not wipe it.
Oil based it very forgivable don't worry about the mark you've just made

After your first coat fully dries in 13 hours you will feel much more comfortable with understanding all the brush stroke leveling method because your piece will be shining with reflection. With its second coat it will be even glossier!!
Patience is key.
Wrap that brush, tight in a baggy. Don't leave it out and don't try and clean it what EVER you do!
If by chance you get any drips on a part of your skin immediately wipe clean with a paper towel, don't wash it. I've had oil based paint on my skin for like a week.
It's really attractive. :)
This is the first segment of "Painting with oil based paint" and will be continued in a couple days with the 2nd post. Stay tuned!

No comments:
Post a Comment